EN
EN
What is Aluminum Profile and How Does It Work?
2026/09/30
Source aluminum profiles for versatile modular framing. Learn extrusion mechanics, strength benefits & corrosion resistance. Request details.

2026/09/17
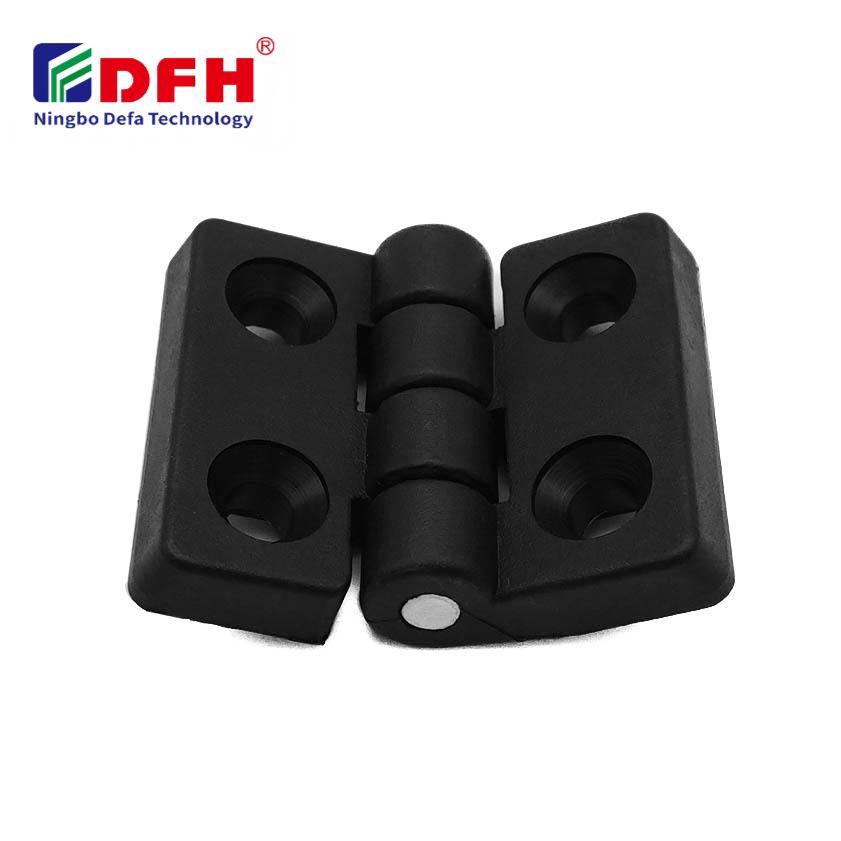
Installing a hinge correctly is fundamental to ensuring that doors and cabinet doors operate smoothly, remain aligned, and perform reliably over time. Whether you're working with residential doors, commercial installations, or cabinet systems, improper hinge installation can lead to misalignment, binding, sagging, and accelerated wear on both the hinge and the door itself. Understanding the correct techniques for hinge placement, fastening, and adjustment will help you avoid costly mistakes and extend the functional lifespan of your installation.
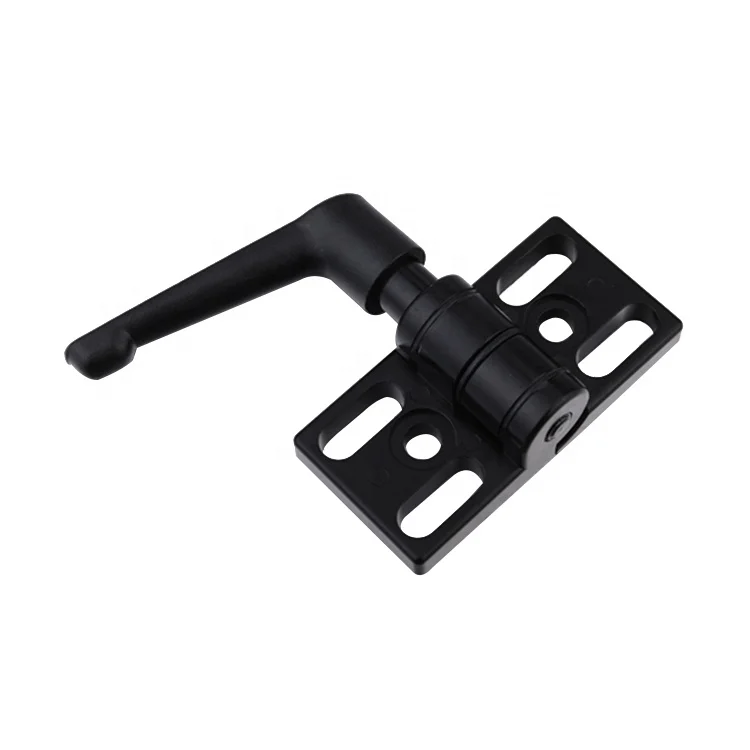
A properly installed hinge requires attention to multiple factors beyond simple drilling and fastening. The weight distribution, door clearances, hinge load capacity, and mounting surface preparation all play critical roles in the final outcome. Door hinge installation must account for the specific cabinet hinge types you're using, the material of the door and frame, and the environmental conditions where the door will operate. This comprehensive guide walks you through each essential step to achieve professional-quality results.
Cabinet hinge types vary significantly based on application, mounting style, and load capacity. Common varieties include butt hinges, concealed hinges, pivot hinges, and specialty hinges designed for specific use cases. Butt hinges mount on the surface of the door and frame, making them visible but straightforward to install. Concealed hinges, also called cup hinges, sit inside pre-drilled holes and offer a cleaner aesthetic while providing excellent support. Understanding which cabinet hinge types suit your project ensures that your hinge installation will both look professional and function correctly over extended use.
Every hinge has a specified hinge load capacity, typically measured in pounds or kilograms. This rating indicates the maximum weight the hinge can safely support without deforming or failing. Door hinge installation must never exceed the manufacturer's stated hinge load capacity, as doing so will lead to premature failure and potential safety hazards. For heavy doors or cabinets, you may need to install multiple hinges or upgrade to heavy-duty models. Always verify that the combined hinge load capacity of all hinges exceeds the weight of your door by at least twenty percent to provide a safety margin.
Before beginning any door hinge installation, thoroughly inspect and prepare both the door and frame surfaces. Clean away dust, paint, or debris that could prevent proper seating of the hinge. If the mounting surface is uneven or warped, sand or plane it until it sits flat. For wooden surfaces, ensure the grain runs in a stable direction and that the wood is not soft or damaged. Moisture and temperature can cause wood to swell or shrink, so allow materials to acclimate to the installation environment for at least 24 hours. A properly prepared surface guarantees that your hinge will make full contact with both the door and frame, distributing weight evenly and preventing wobbling.
Accurate marking is critical for proper door hinge installation. Standard practice places the upper hinge approximately two inches from the top of the door and the lower hinge two inches from the bottom. Measure twice to confirm both hinges are aligned vertically, as even slight deviations will cause the door to hang unevenly. Use a carpenter's square or level to mark the centerline where each hinge will mount. Mark the screw hole positions lightly with a pencil or marking knife. For cabinet hinge types that use cup holes, use the template provided by the manufacturer to ensure exact bore depth and placement. Precision in this step directly affects how smoothly your installed door will swing.
Once you've marked your positions, drill pilot holes slightly smaller than your screws to prevent wood splitting and ensure the screws seat correctly. Pilot holes are especially important when working with hardwood or when installing near the edges of doors. When fastening the hinge, insert all screws loosely first, then gradually tighten them in a cross pattern to ensure even seating and prevent the hinge from tilting. Over-tightening screws can strip threads or compress the mounting surface, compromising the hinge load capacity. For door hinge installation on metal frames, use self-tapping screws or pre-drilled holes with appropriate fasteners rated for metal substrates. Check that the hinge swings freely without binding before fully tightening the final fastener.
After fastening, test the door swing to identify any misalignment or binding. The door should close smoothly without scraping the frame or sticking at any point. If adjustment is needed, loosen the fasteners slightly and shift the hinge position incrementally until alignment is correct. Many modern cabinet hinge types include built-in adjustment mechanisms that allow fine-tuning without removing the hinge entirely. Ensure consistent clearance between the door and frame on all sides—typically one-eighth inch for smooth operation. Once alignment is confirmed, fully tighten all fasteners and verify that the hinge load capacity is not being compromised by excessive force or binding during door operation.
Standard door hinge installation typically positions the upper hinge approximately two inches from the top of the door and the lower hinge two inches from the bottom. For doors taller than 84 inches, adding a third center hinge can help distribute the hinge load capacity more evenly and prevent sagging. Always maintain vertical alignment between hinges to ensure the door hangs straight and operates smoothly without binding or misalignment.
Selecting the right cabinet hinge types depends on your door weight, aesthetic preferences, and installation environment. Butt hinges work well for traditional applications and are easy to install but are visible. Concealed hinges provide a modern look and excellent support for cabinet doors. Review the hinge load capacity requirements for your specific door weight and material. Heavy doors or cabinets may require heavy-duty or multiple hinges to safely support the weight without failure or performance degradation.
Door sagging often indicates that the hinge load capacity is being exceeded or that fasteners have loosened over time. First, verify that the door weight does not exceed the combined hinge load capacity of all installed hinges. Check all screws and tighten any that have become loose. If sagging persists, you may need to add an additional hinge or upgrade to hinges with greater hinge load capacity. Inspect the mounting surface for damage or compression that could prevent proper hinge seating and support.
2026/09/30
Source aluminum profiles for versatile modular framing. Learn extrusion mechanics, strength benefits & corrosion resistance. Request details.
2026/09/30
Source aluminum profiles for construction projects. Learn structural framing, cladding & window benefits for maximum ROI. Download guide.
2026/09/30
Source optimal aluminum profile sizing techniques. Evaluate load, space, alloy, environment & cost factors to prevent deflection. Download guide.
2026/09/30
Struggling with fastener failures or rework? Master screw sizing by diameter, pitch, material, and load—plus industry-specific standards. Optimize reliability & compliance now.
2026/09/30
Source aluminum profiles for industrial engineering. Discover strength-to-weight ratios, corrosion resistance & 30% cost savings. Download guide.
2026/09/30
Source heat-resistant aluminum profile systems. Master thermal expansion science & stress management strategies for industrial builds. Download guide.